You spent an hour at the bench zeroing your rifle and shooting sub-MOA groups off sandbags. Then opening morning arrives in Oregon's high desert, you find a mule deer buck at 280 yards on a sidehill, and there's nothing flat to lie on, no tree to brace against, and 90 seconds before he walks into the timber. How does your range work translate to that moment?
For most hunters, the honest answer is: not well enough. The bench rest is a calibration tool, not a training method. Real-world shooting in the western backcountry demands a repertoire of field positions, practiced until they're automatic under pressure. Here's what to build.
The Hierarchy of Stability
Before breaking down individual positions, understand the fundamental principle: every point of contact between you, your rifle, and something solid reduces wobble. Prone beats sitting beats kneeling beats standing. Supported beats unsupported. Your goal in any field shooting situation is to find the most stable position possible in the time available. Never rush into standing when you have five seconds to drop into a sit.
Prone: Your Foundation
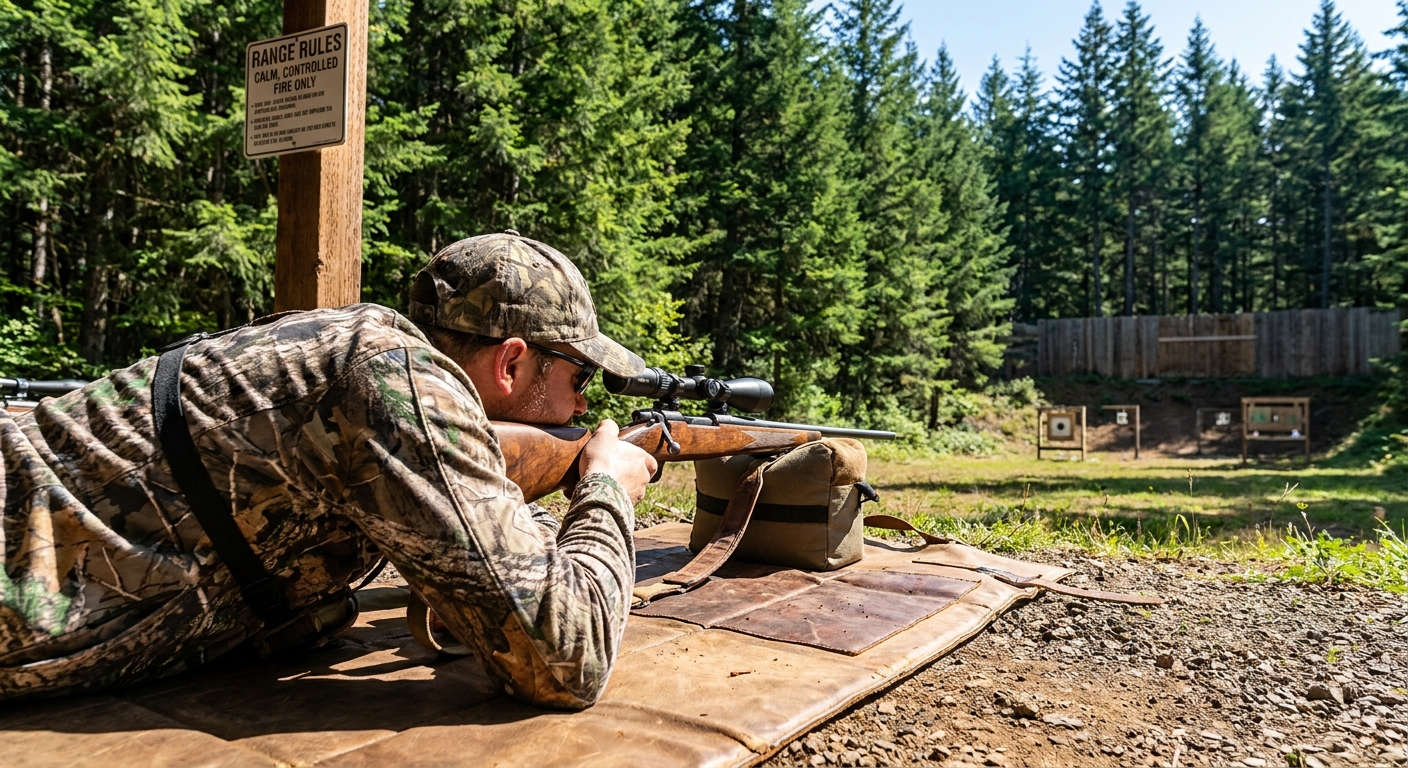
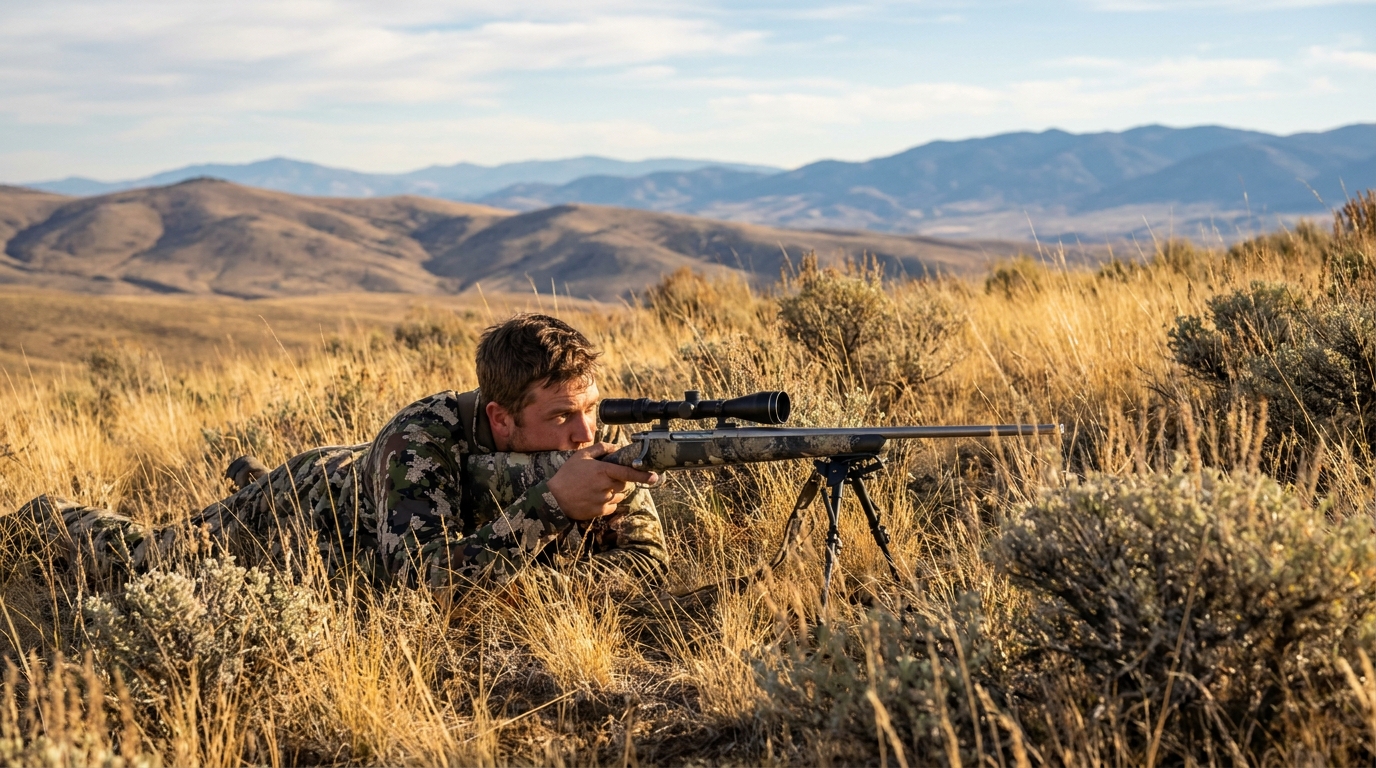
Prone is the most stable unsupported field position. When the terrain allows it, get prone. The rifle rests on the bipod, a pack, a rolled jacket, or your hand — not directly on the ground. Direct contact with the ground transmits vibration and can cause the barrel to jump unpredictably on firing (especially on a bipod).
Key Points
- Body angle: Position your body at roughly 30 degrees off the bore axis, not directly behind the rifle. This allows the recoil to push back and slightly away rather than straight into your shoulder.
- Rear bag or hand: Cradle the stock's toe in your shooting hand or a small rear bag. Squeeze and release to adjust elevation without disturbing your natural point of aim.
- Natural point of aim: Before settling in, confirm that when you close your eyes and reopen them, the crosshairs are still on target. If not, move your whole body — don't muscle the rifle with your arm.
- Bipod cant: On uneven terrain, tilt the bipod legs independently so the rifle isn't canted. A canted rifle causes point-of-impact shifts at distance that can't be corrected by dialing.
Sitting: The Versatile Middle Ground
Sitting positions are undervalued and underused. In sagebrush flats, along hillsides, in the glassing pockets of eastern Oregon's coulees — anywhere that prone puts your muzzle in the dirt or limits your field of view — sitting works. A properly locked-in sitting position rivals prone for practical field accuracy out to 400+ yards.
Cross-Legged Sitting (Crossed Ankle)
Sit with legs crossed, lean slightly forward, and place both elbows on or inside the knees — not on top, which creates a pivot point. The elbows should contact the flat inner surface of the knee just below the knee cap. Curl your non-shooting hand back to the stock, canting the rifle into your shoulder. This creates a triangulated, locked position.
Open-Leg Sitting
Soles of both feet flat on the ground, knees at roughly 45 degrees, elbows planted low on shins rather than knees. Better for shots requiring more elevation (downhill shots) where crossed-leg position puts your barrel below the target.
Using a Tripod or Shooting Sticks from Sitting
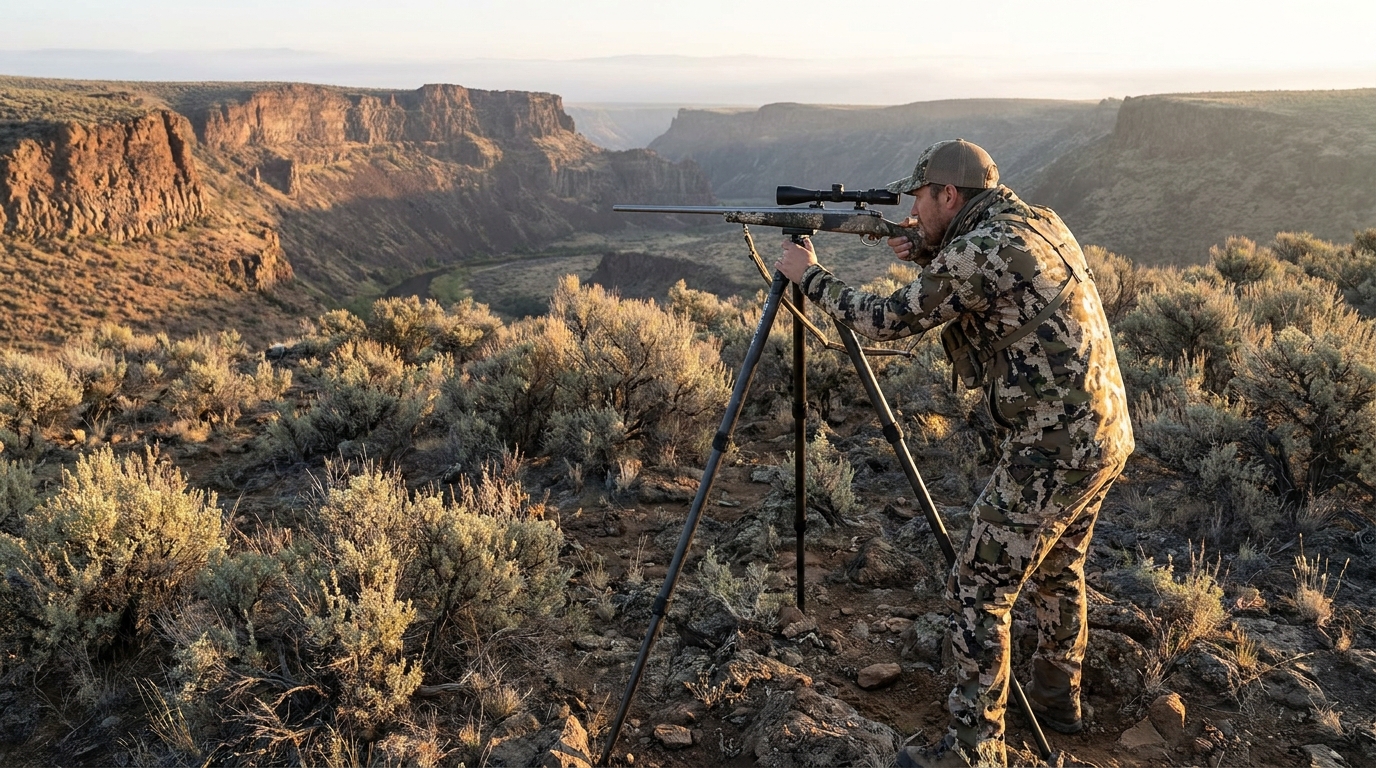
A carbon tripod with a rifle cradle head (Spartan Precision, Javelin Pro Hunt) combined with a sitting position creates a platform that approaches bench rest stability in the field. This is increasingly common among serious western hunters and is worth the weight penalty for any hunt involving long shots on flat to rolling terrain.
Kneeling: When Sitting Isn't Fast Enough
Kneeling gets you above grass and brush with more speed than prone or sitting. It's inherently less stable because you have three points of contact instead of five, but it's often the best you'll get on a fast opportunity.
Drop to your strong-side knee, plant your non-shooting elbow firmly on the flat of your weak-side knee — again, inside or on the flat, not on the point. Lean into it. Your body should feel like a solid triangle, not a shaky post.
Kneeling is significantly improved by a set of collapsible shooting sticks. Pre-deployed sticks at kneeling height can mean the difference between a controlled 2-second shot and a rushed flinch-fest. Practice deploying your sticks from a kneeling drop in under five seconds.
Supported Standing: The Last Resort That Can Work
Standing off a tree, boulder, fence post, or cliff face is not ideal, but it beats unsupported standing by a large margin. The critical rule: never let the barrel touch the support surface. The barrel must float free. Rest the fore-end or your hand on the support, not the barrel itself.
Wrap your non-shooting arm around a tree or rock, pull the fore-end back into the wrap, and create a tight, pulling pressure into your shoulder. A sling in the support-sling configuration helps enormously here — properly tensioned, a military-style shooting sling can reduce wobble in a supported standing position by 30–40%.
Using Your Pack as a Rest
Your pack is one of the most useful shooting aids in the field. Learn to use it in multiple configurations:
- Prone front rest: Pack flat on the ground, rifle resting in the main strap channel or top strap loop. Higher than a bipod, works on rough ground.
- Sitting/kneeling support: Pack stood upright against a tree or rock, rifle rested over the top. Excellent for elevated shots.
- Over-the-top standing: Pack draped over a boulder or log, rifle rested in the padded frame. Creates a surprisingly stable platform.
Whatever position you use, fill the pack with your gear before hunting season — a half-empty pack with shifting weight is much less consistent than a packed-out frame.
Practicing Field Positions at the Range
The best way to build this skillset is structured dry-fire and live-fire practice in field positions — never at a bench. Before your next hunting season, run this routine:
- Set up three targets at 100, 200, and 300 yards
- Start from a standing position 50 yards from the first target, drop into prone, fire one shot, move to sit, fire one shot, kneel, fire one shot
- Time yourself — the goal is sub-30-second engagement from the draw to the third shot
- Add pack deployment, sticks deployment, and inclined ground to the drill over time
You'll be embarrassed by your first attempts. Everyone is. But after 10 sessions, you'll be a different shooter in the field.
Know Your True Effective Range from Each Position
Every hunter should know the actual group size they can produce from each position under time pressure. Shoot a 5-shot group prone, sitting, and kneeling at 200 yards with a timer running. Record the results. That data tells you the honest truth about your effective range from each position — and that's the number you should be making hunting decisions with, not your bench group.
Final Thought
Western hunting is a shooting sport as much as a scouting and stalking one. The hunters who consistently fill tags at distance are rarely the best shooters on the bench — they're the ones who've put in the work getting comfortable and competent in the positions the mountain demands. Start now, before the season does.